On-device speaker identification (本地说话人识别)
This page describes how to build SherpaOnnxSpeakerIdentification for on-device speaker identification that runs on HarmonyOS.
Open the project with DevEco Studio
You need to first download the code:
# Assume we place it inside /Users/fangjun/open-source
# You can place it anywhere you like.

cd /Users/fangjun/open-source/

git clone https://github.com/k2-fsa/sherpa-onnx
Then start DevEco Studio and follow the screenshots below:
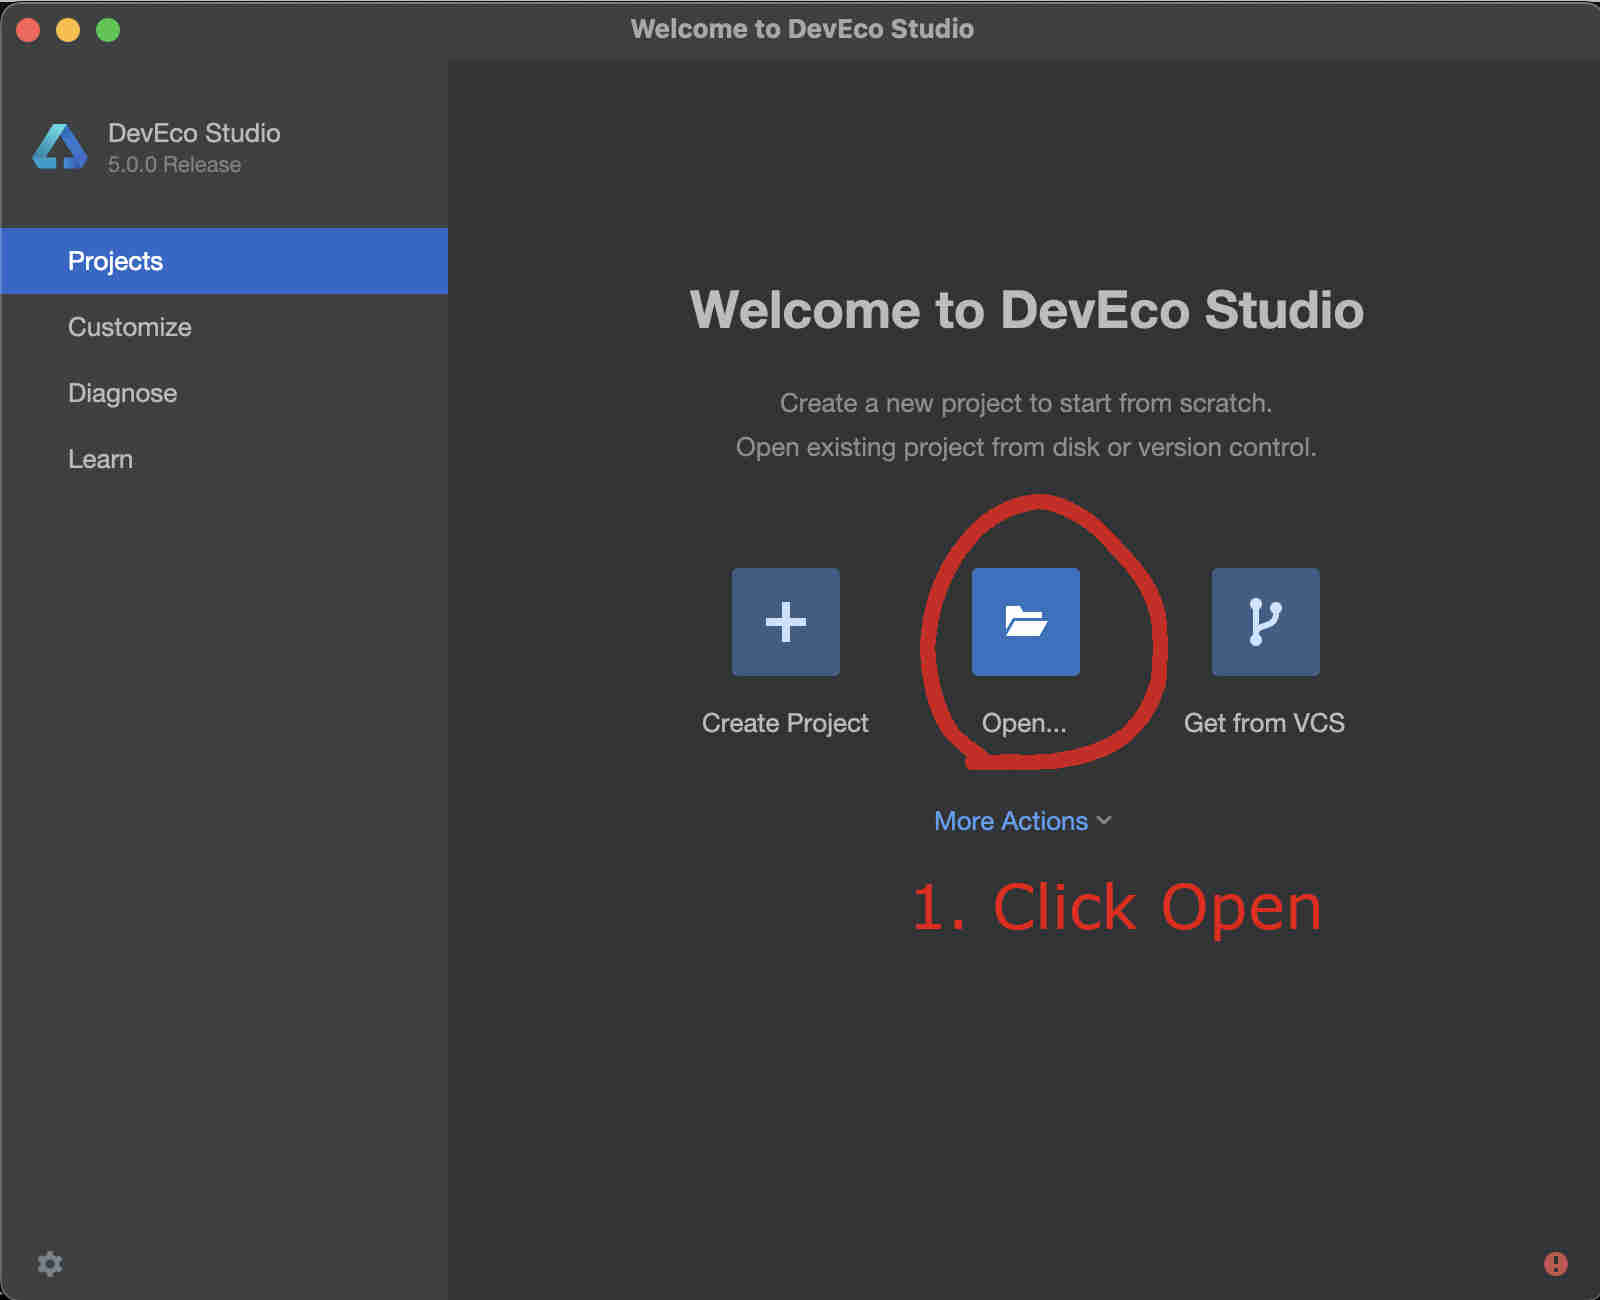
Fig. 43 Step 1: Click Open
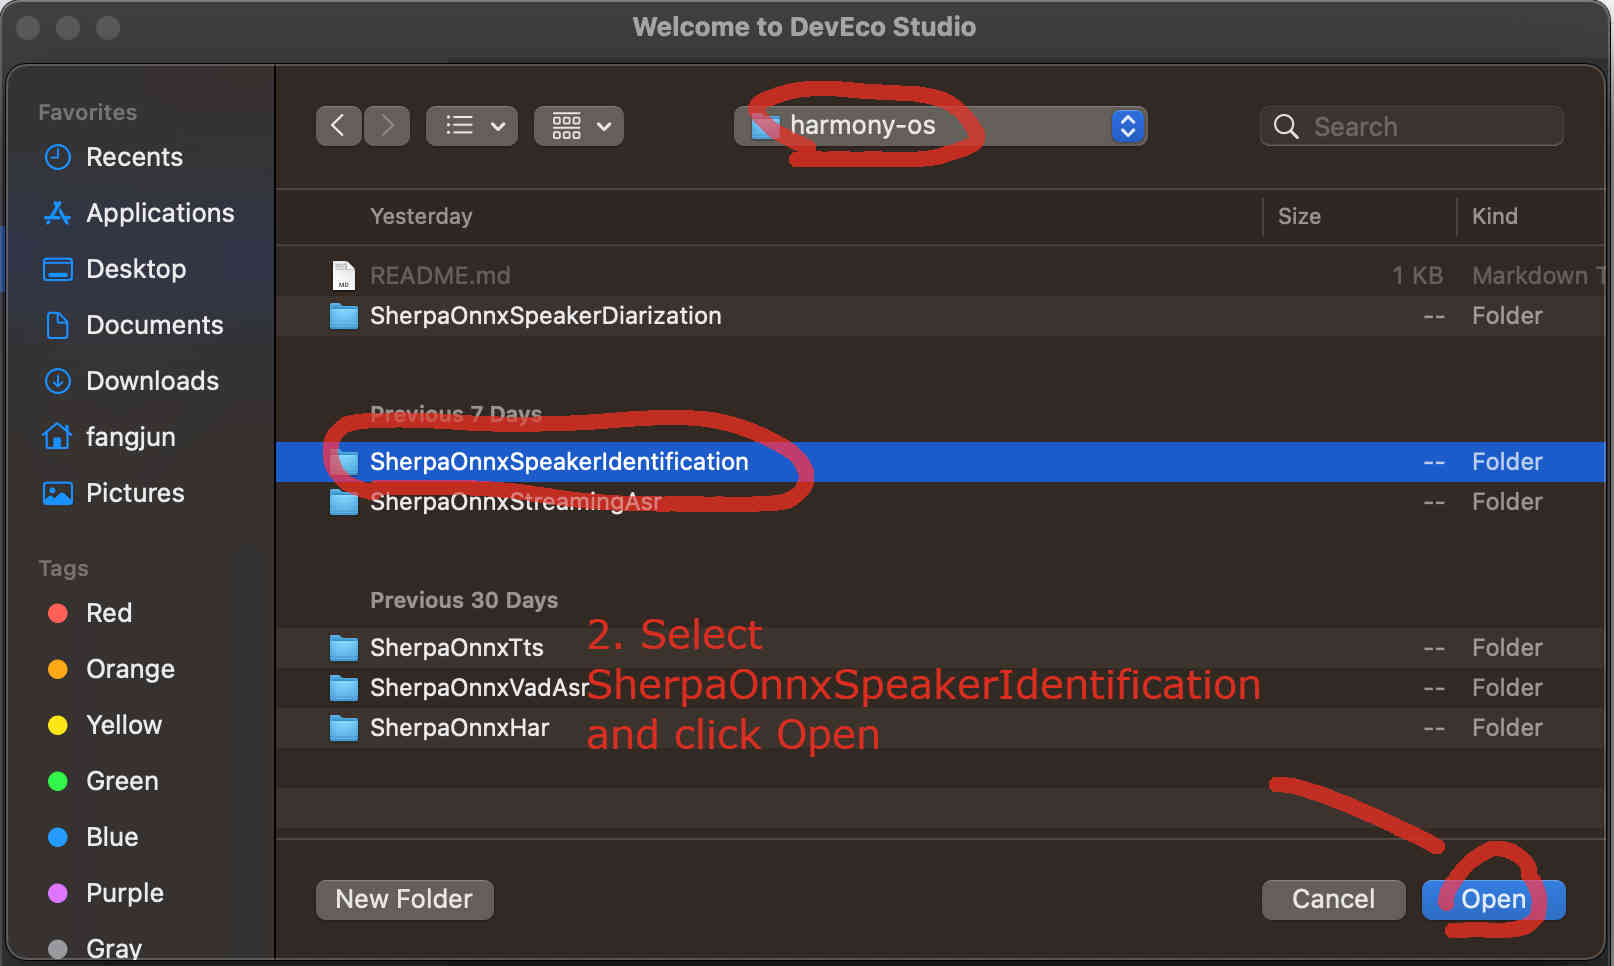
Fig. 44 Step 2: Select SherpaOnnxSpeakerIdentification inside the harmony-os folder and click Open
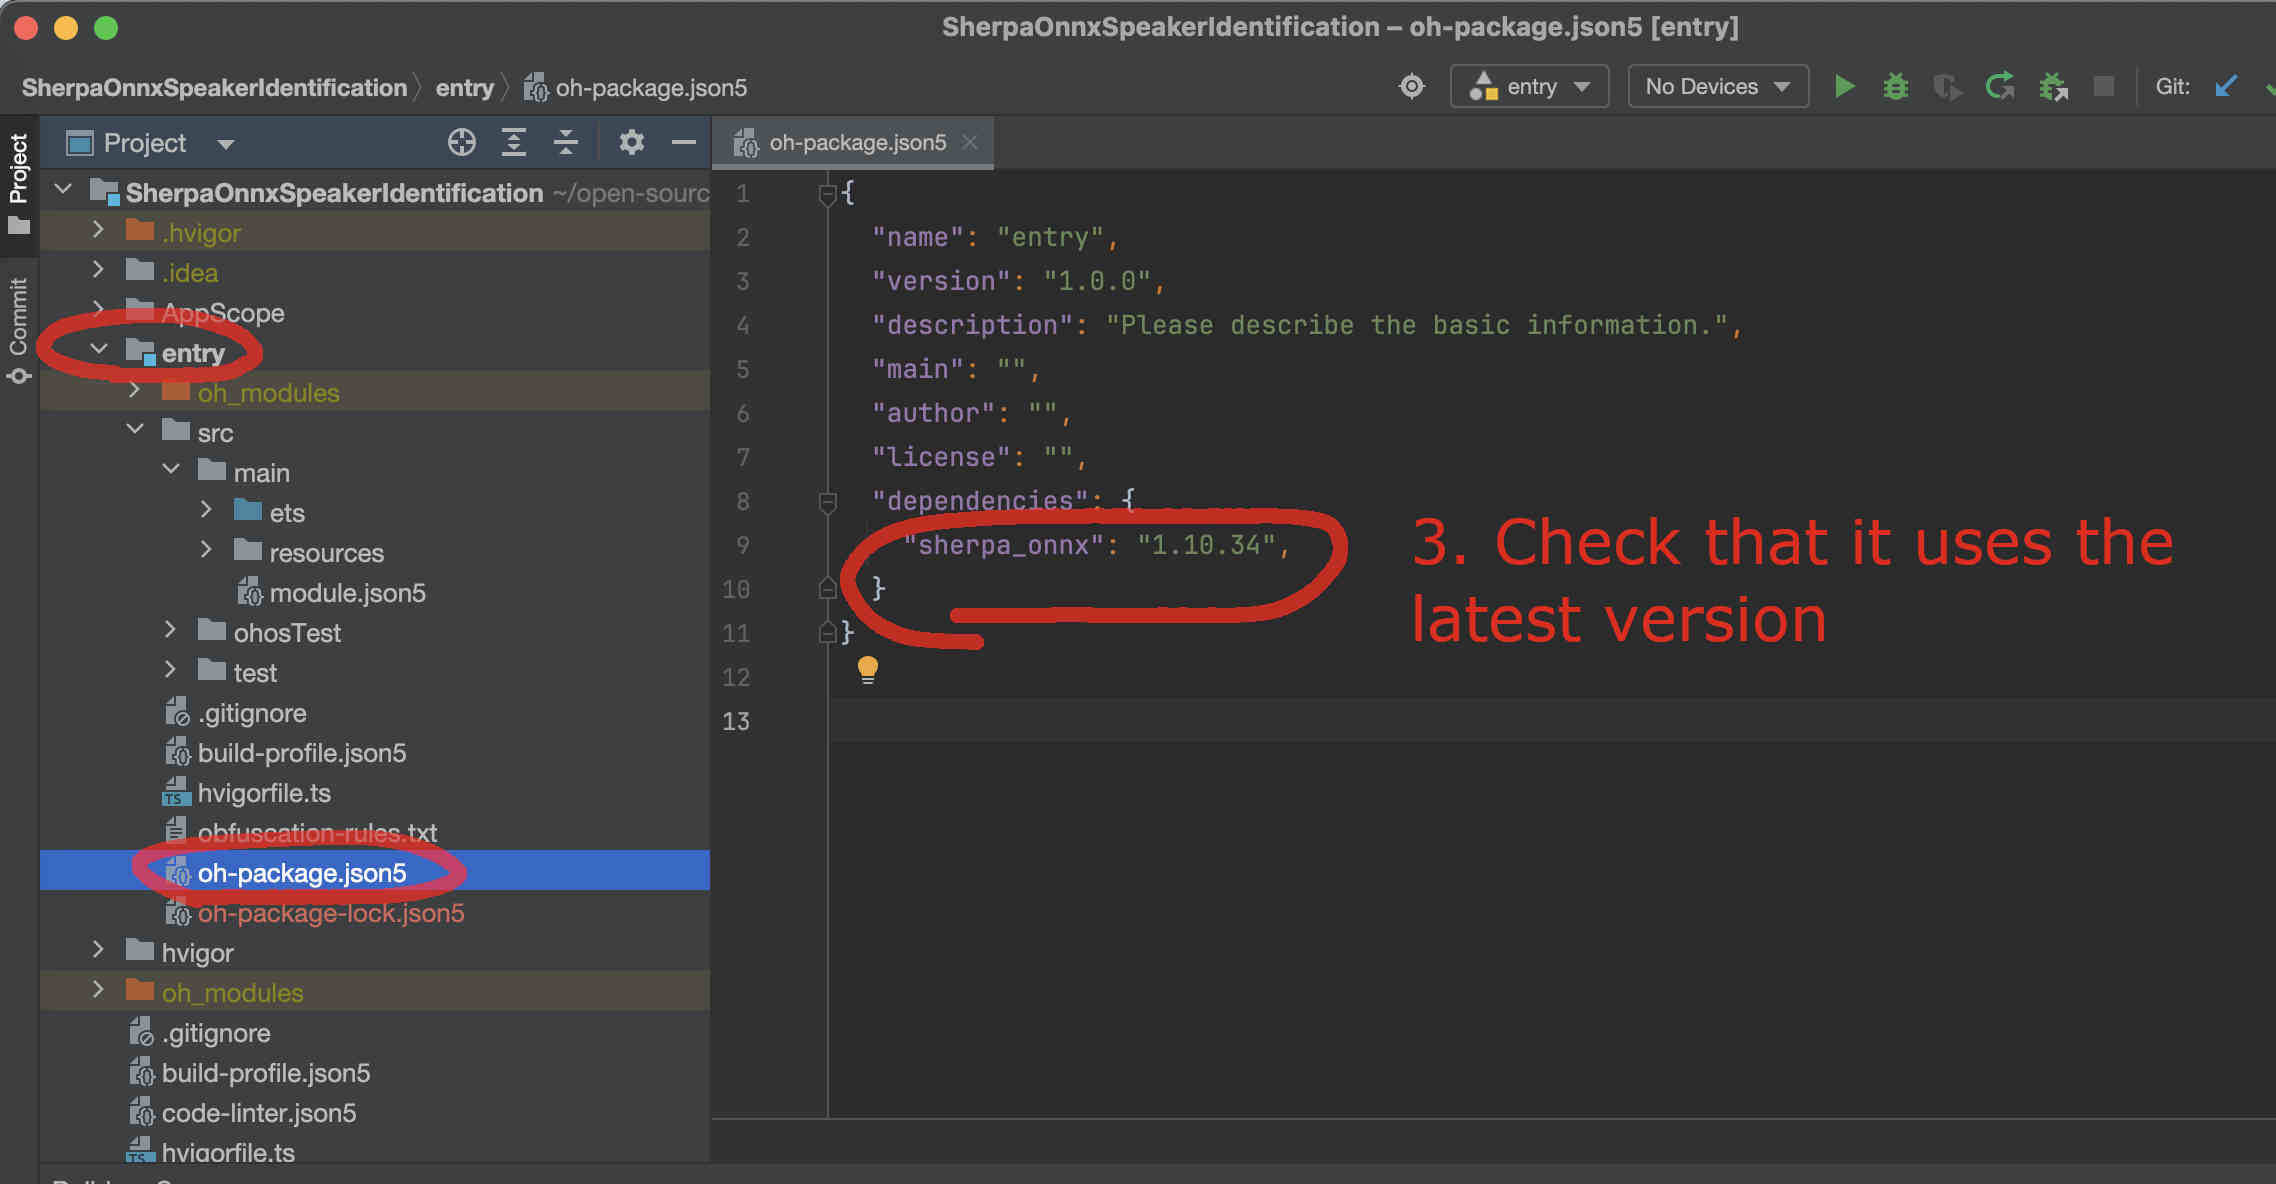
Fig. 45 Step 3: Check that it is using the latest version. You can visit sherpa_onnx to check available versions.
Select a model
The code supports many models for extracting speaker embeddings and you have to select one.
You can find all supported models at
We use the following model
as an example in this document.
Use 3dspeaker_speech_eres2net_base_200k_sv_zh-cn_16k-common.onnx
First, we download it to the rawfile directory.
Caution: You MUST place the file inside the rawfile directory. Otherwise, you would be SAD later.
cd /Users/fangjun/open-source/sherpa-onnx/harmony-os/SherpaOnnxSpeakerIdentification/entry/src/main/resources/rawfile

wget https://github.com/k2-fsa/sherpa-onnx/releases/download/speaker-recongition-models/3dspeaker_speech_eres2net_base_200k_sv_zh-cn_16k-common.onnx
Please check that your directory looks exactly like the following:
(py38) fangjuns-MacBook-Pro:rawfile fangjun$ pwd
/Users/fangjun/open-source/sherpa-onnx/harmony-os/SherpaOnnxSpeakerIdentification/entry/src/main/resources/rawfile

(py38) fangjuns-MacBook-Pro:rawfile fangjun$ ls -lh
total 77888
-rw-r--r--  1 fangjun  staff    38M Oct 14 11:41 3dspeaker_speech_eres2net_base_200k_sv_zh-cn_16k-common.onnx
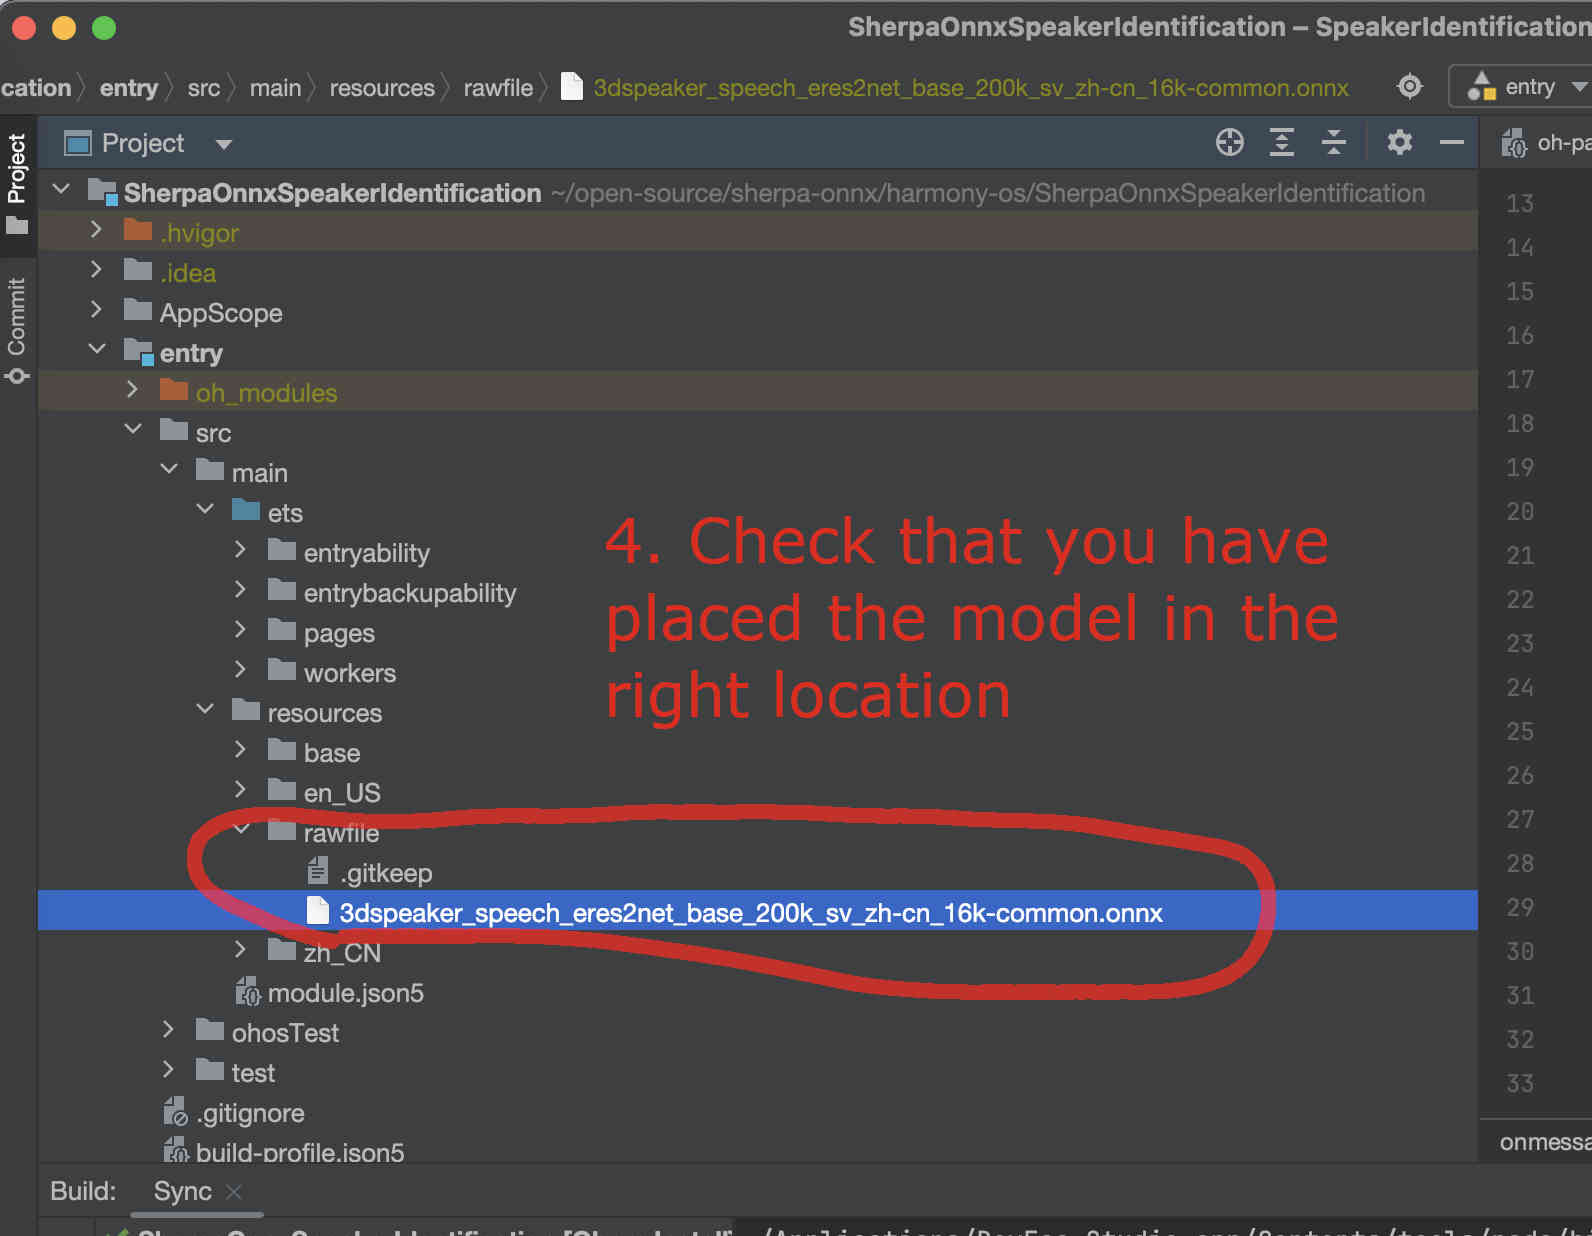
Fig. 46 Step 4: Check that you have placed the model file inside the rawfile directory.
Now we need to change the code to use our selected model.
We have to change SpeakerIdentificationWorker.ets. Please see the following screenshot.
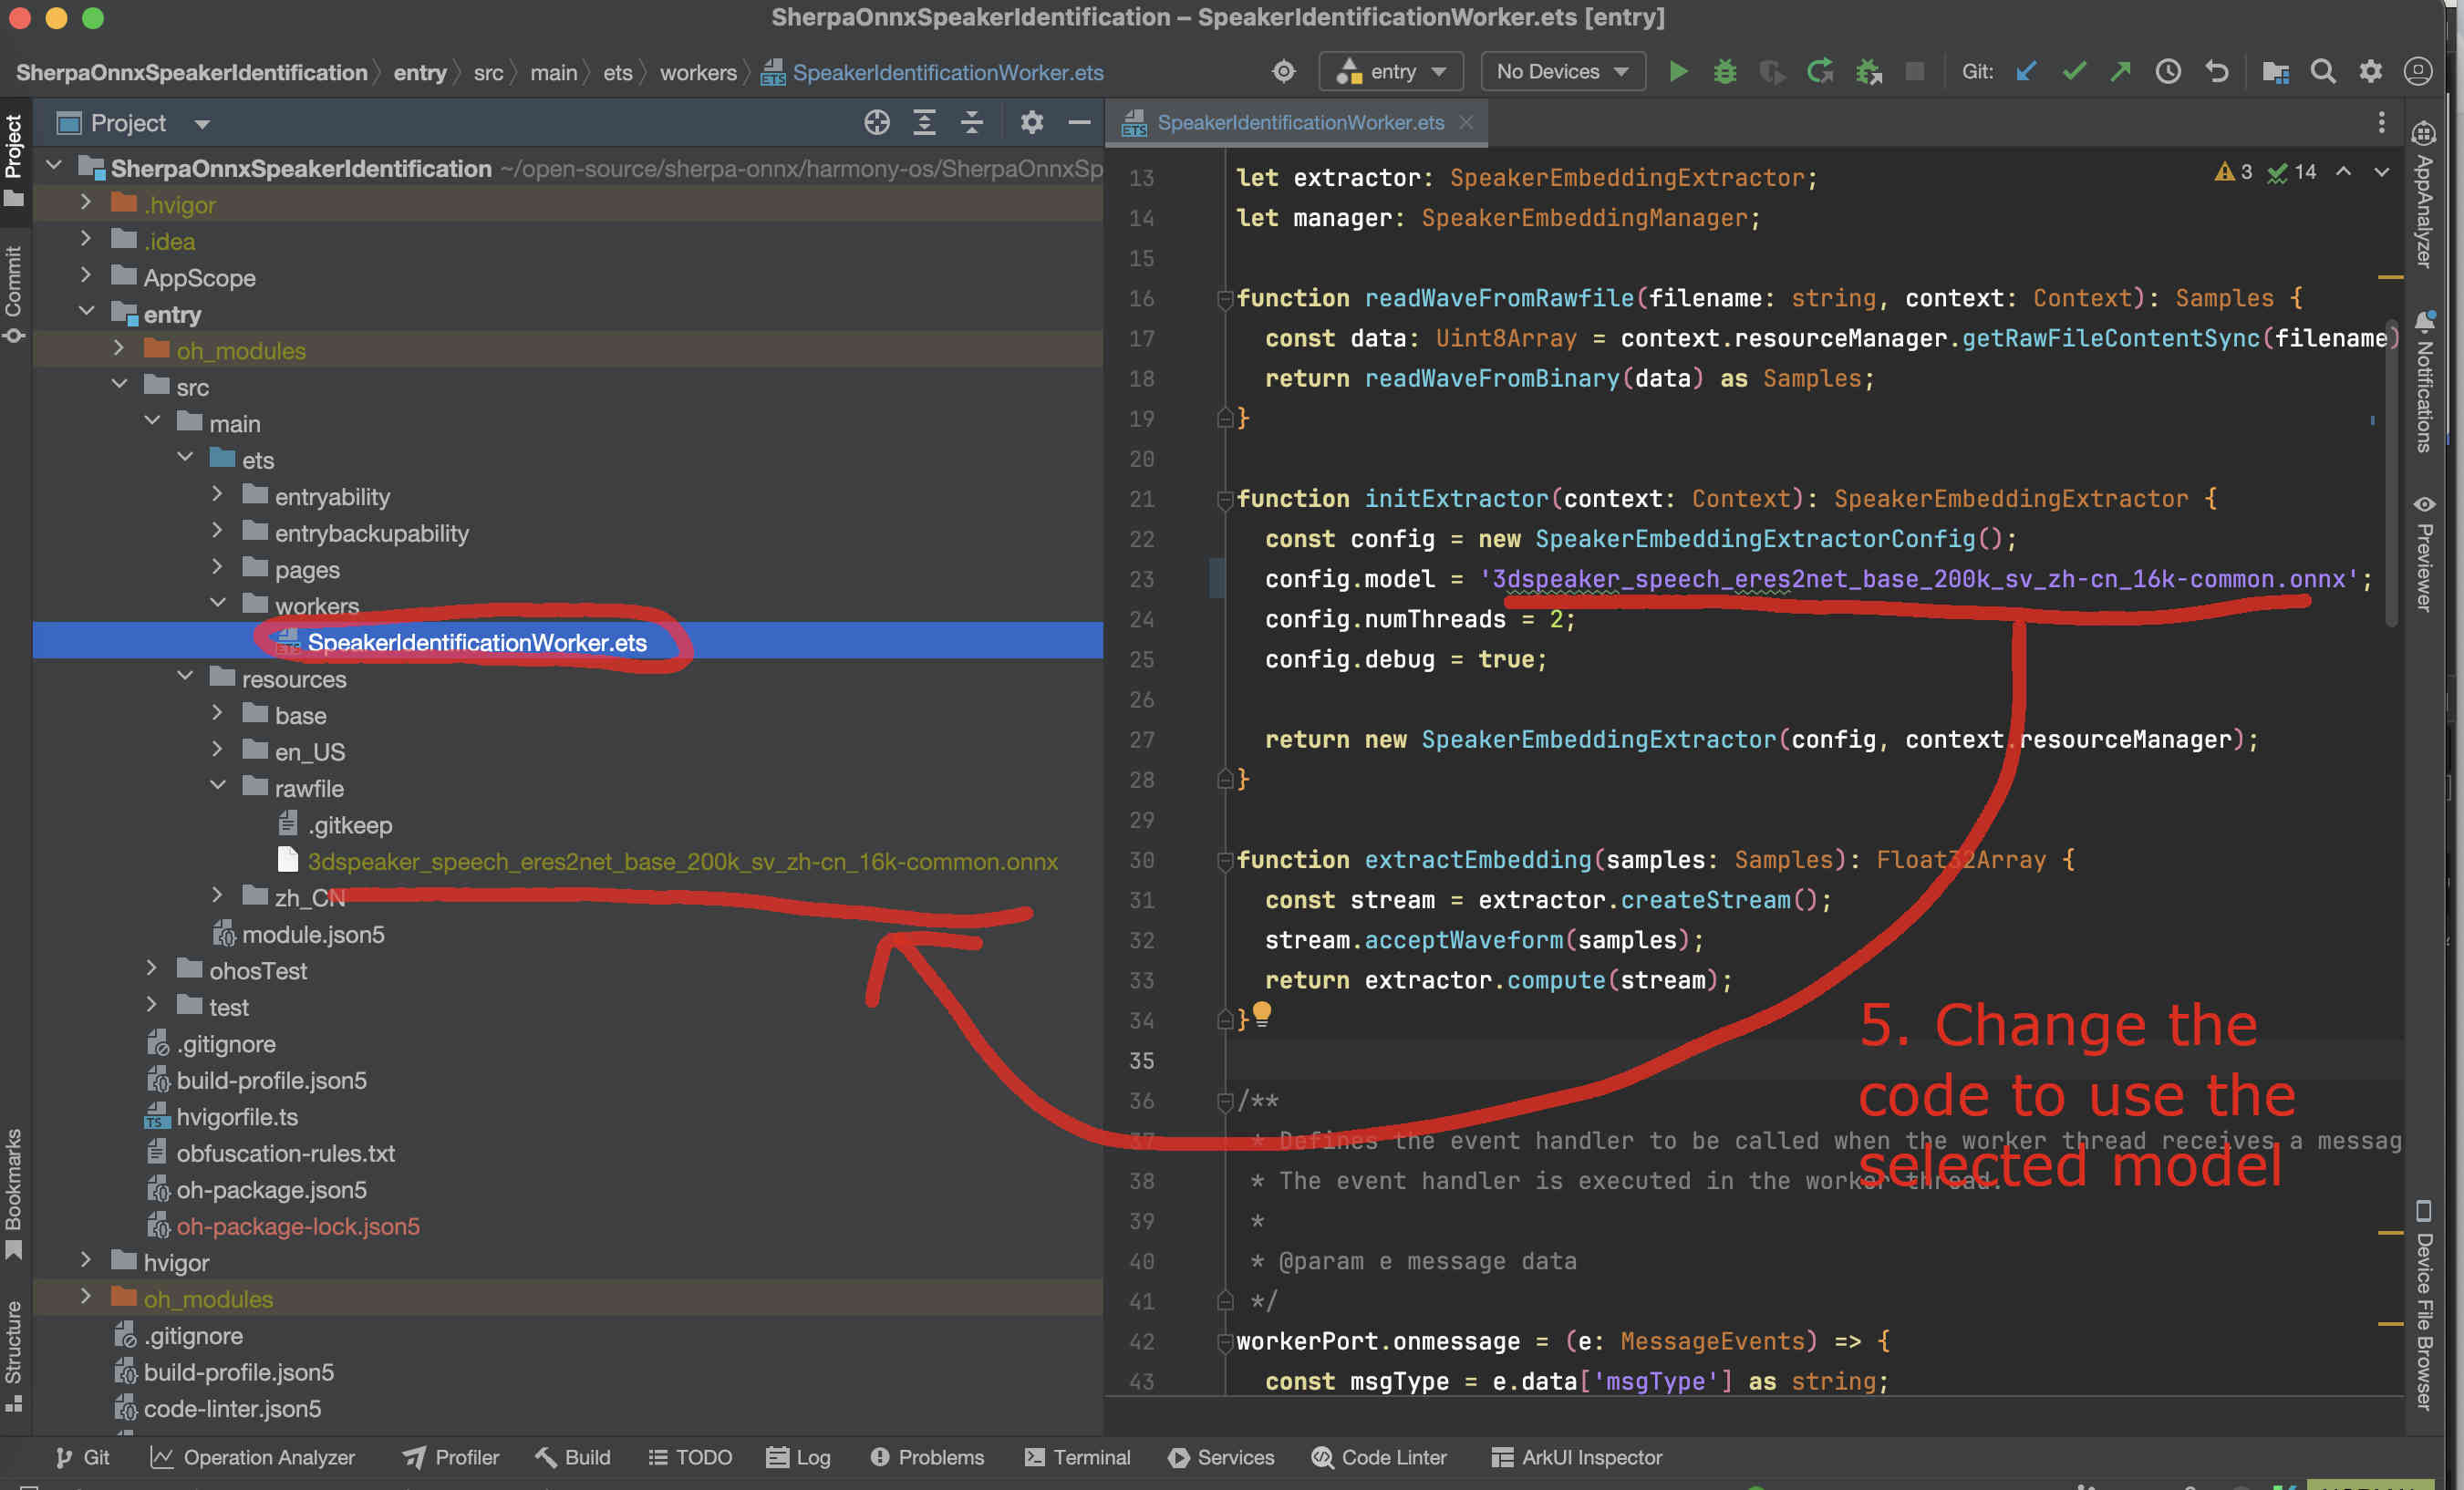
Fig. 47 Step 5: Change the code to use our selected model
Finally, we can build the project. See the screenshot below:
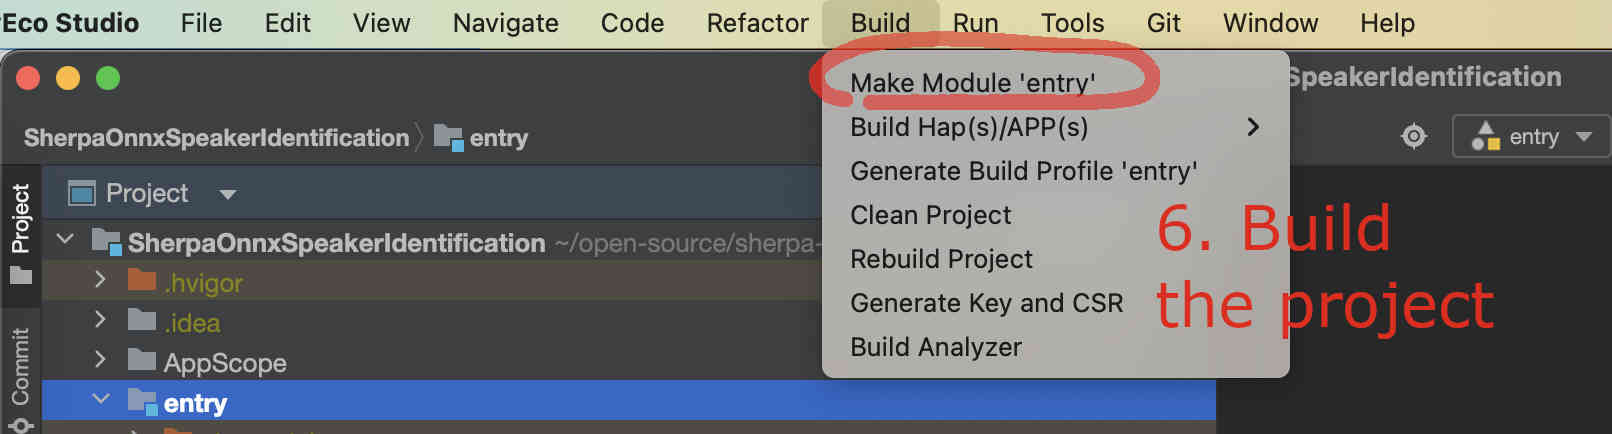
Fig. 48 Step 6: Build the project
If you have an emulator, you can now start it.
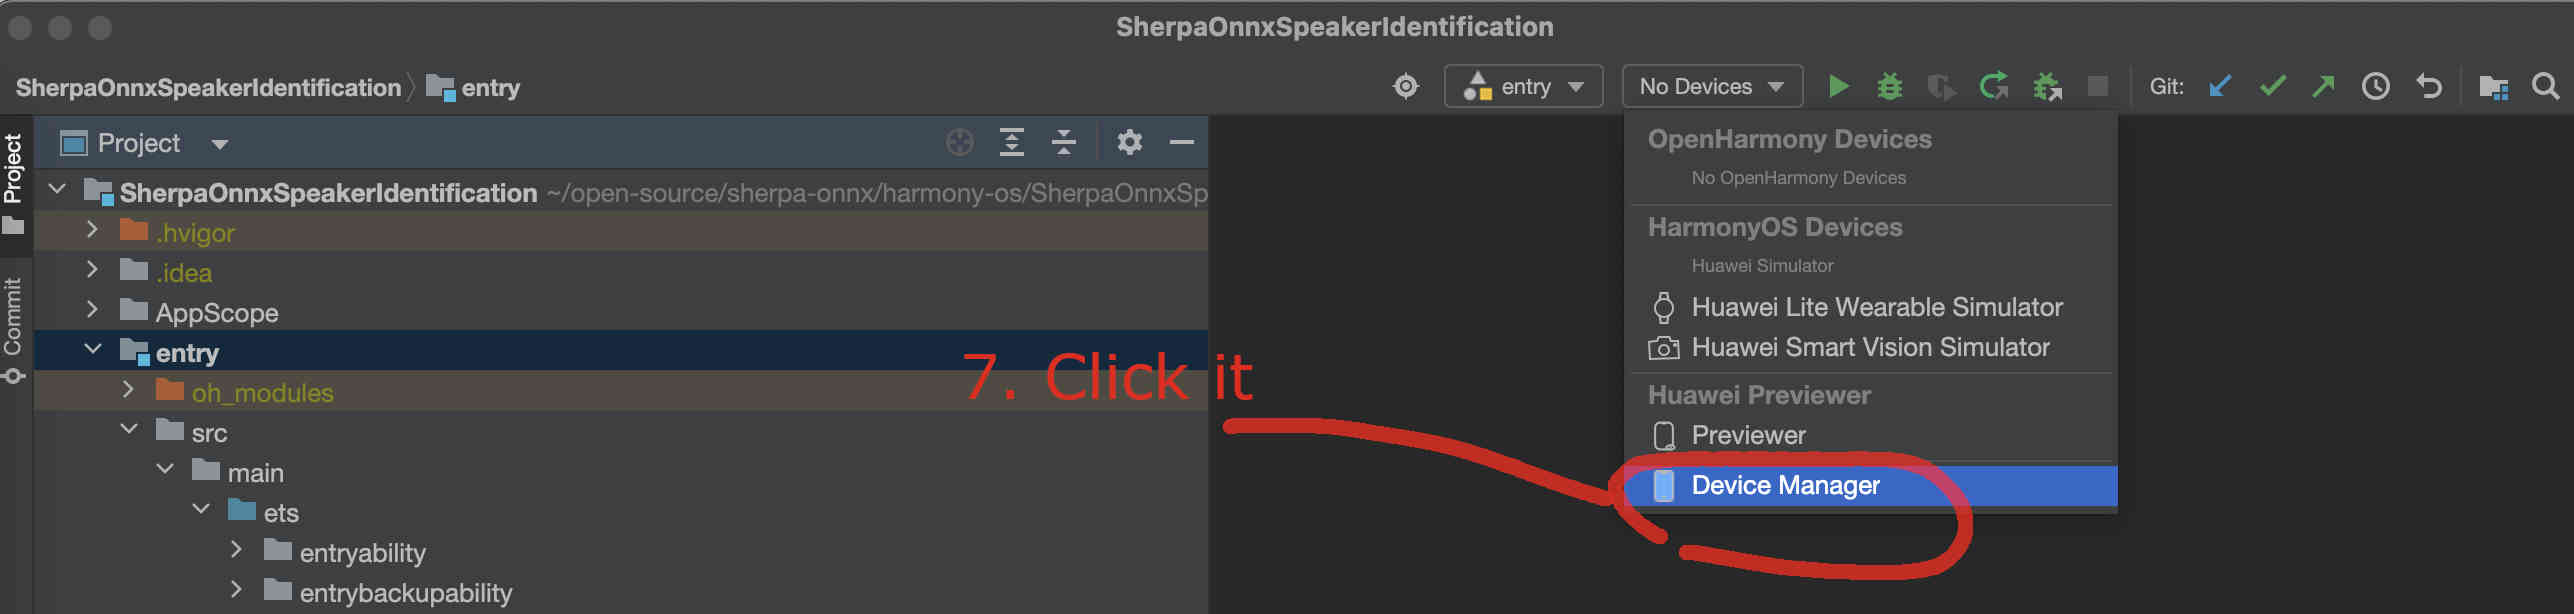
Fig. 49 Step 7: Select the device manager
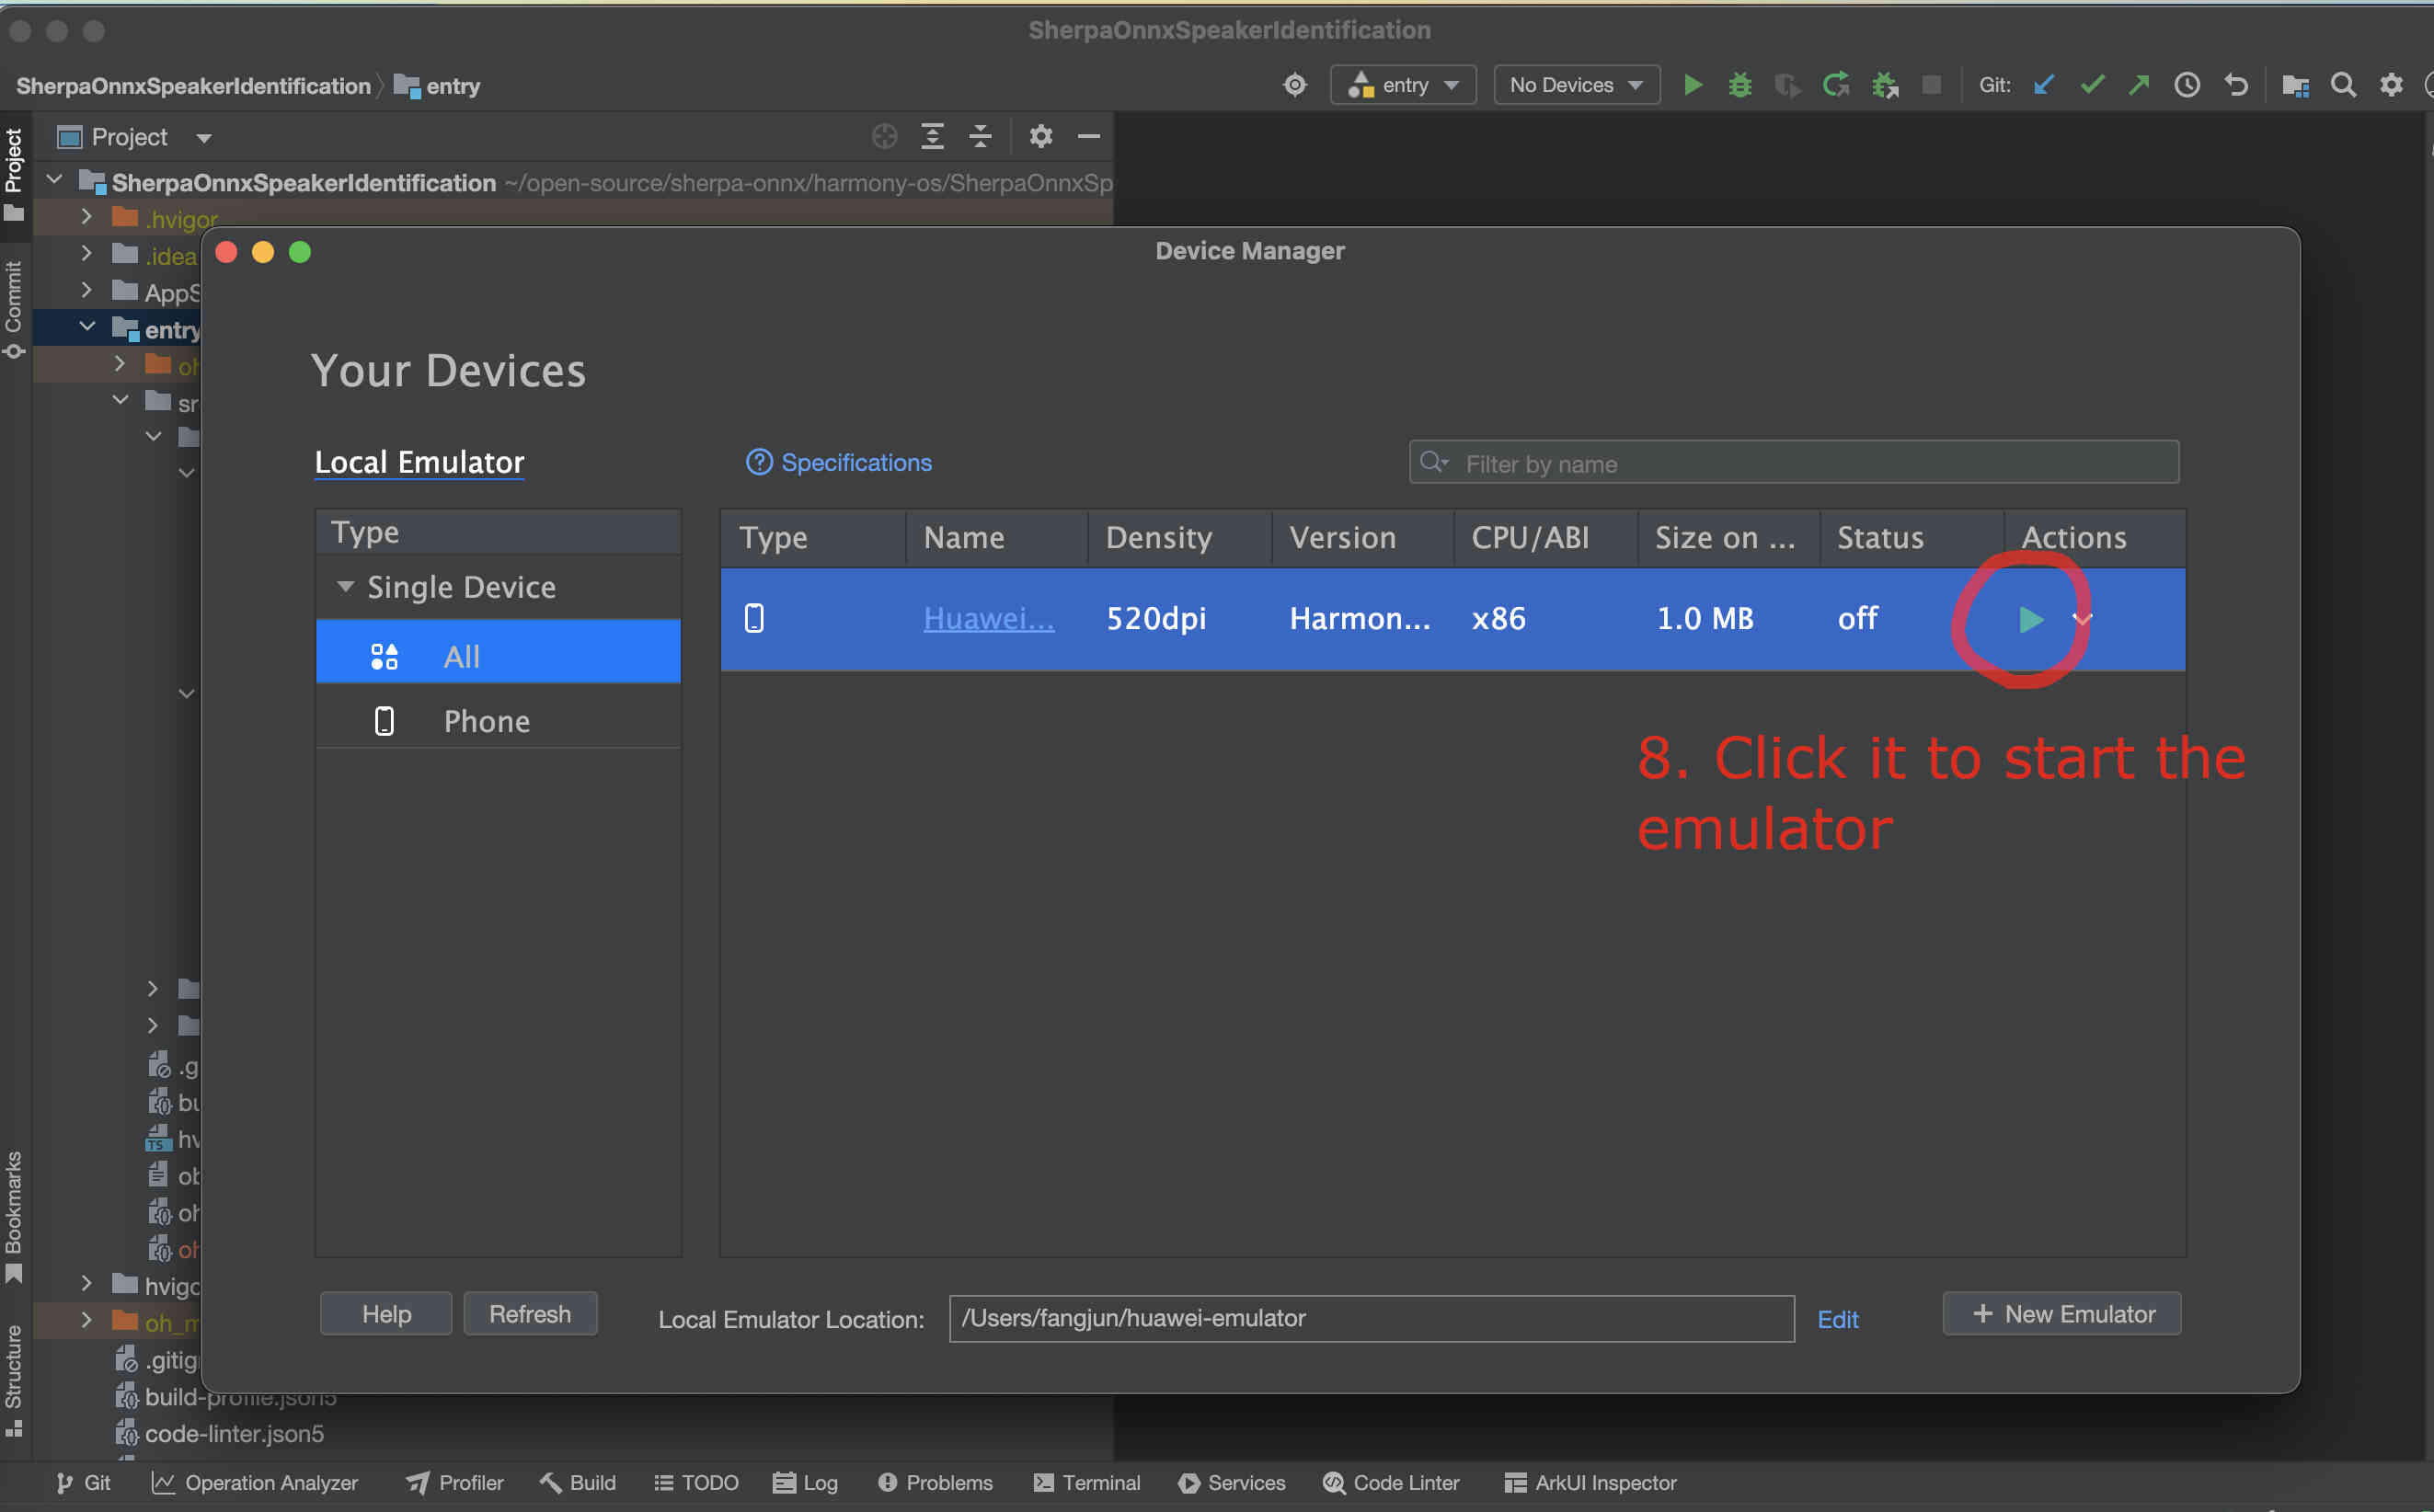
Fig. 50 Step 8: Start the emulator
After the emulator is started, follow the screenshot below to run the app on the emulator:
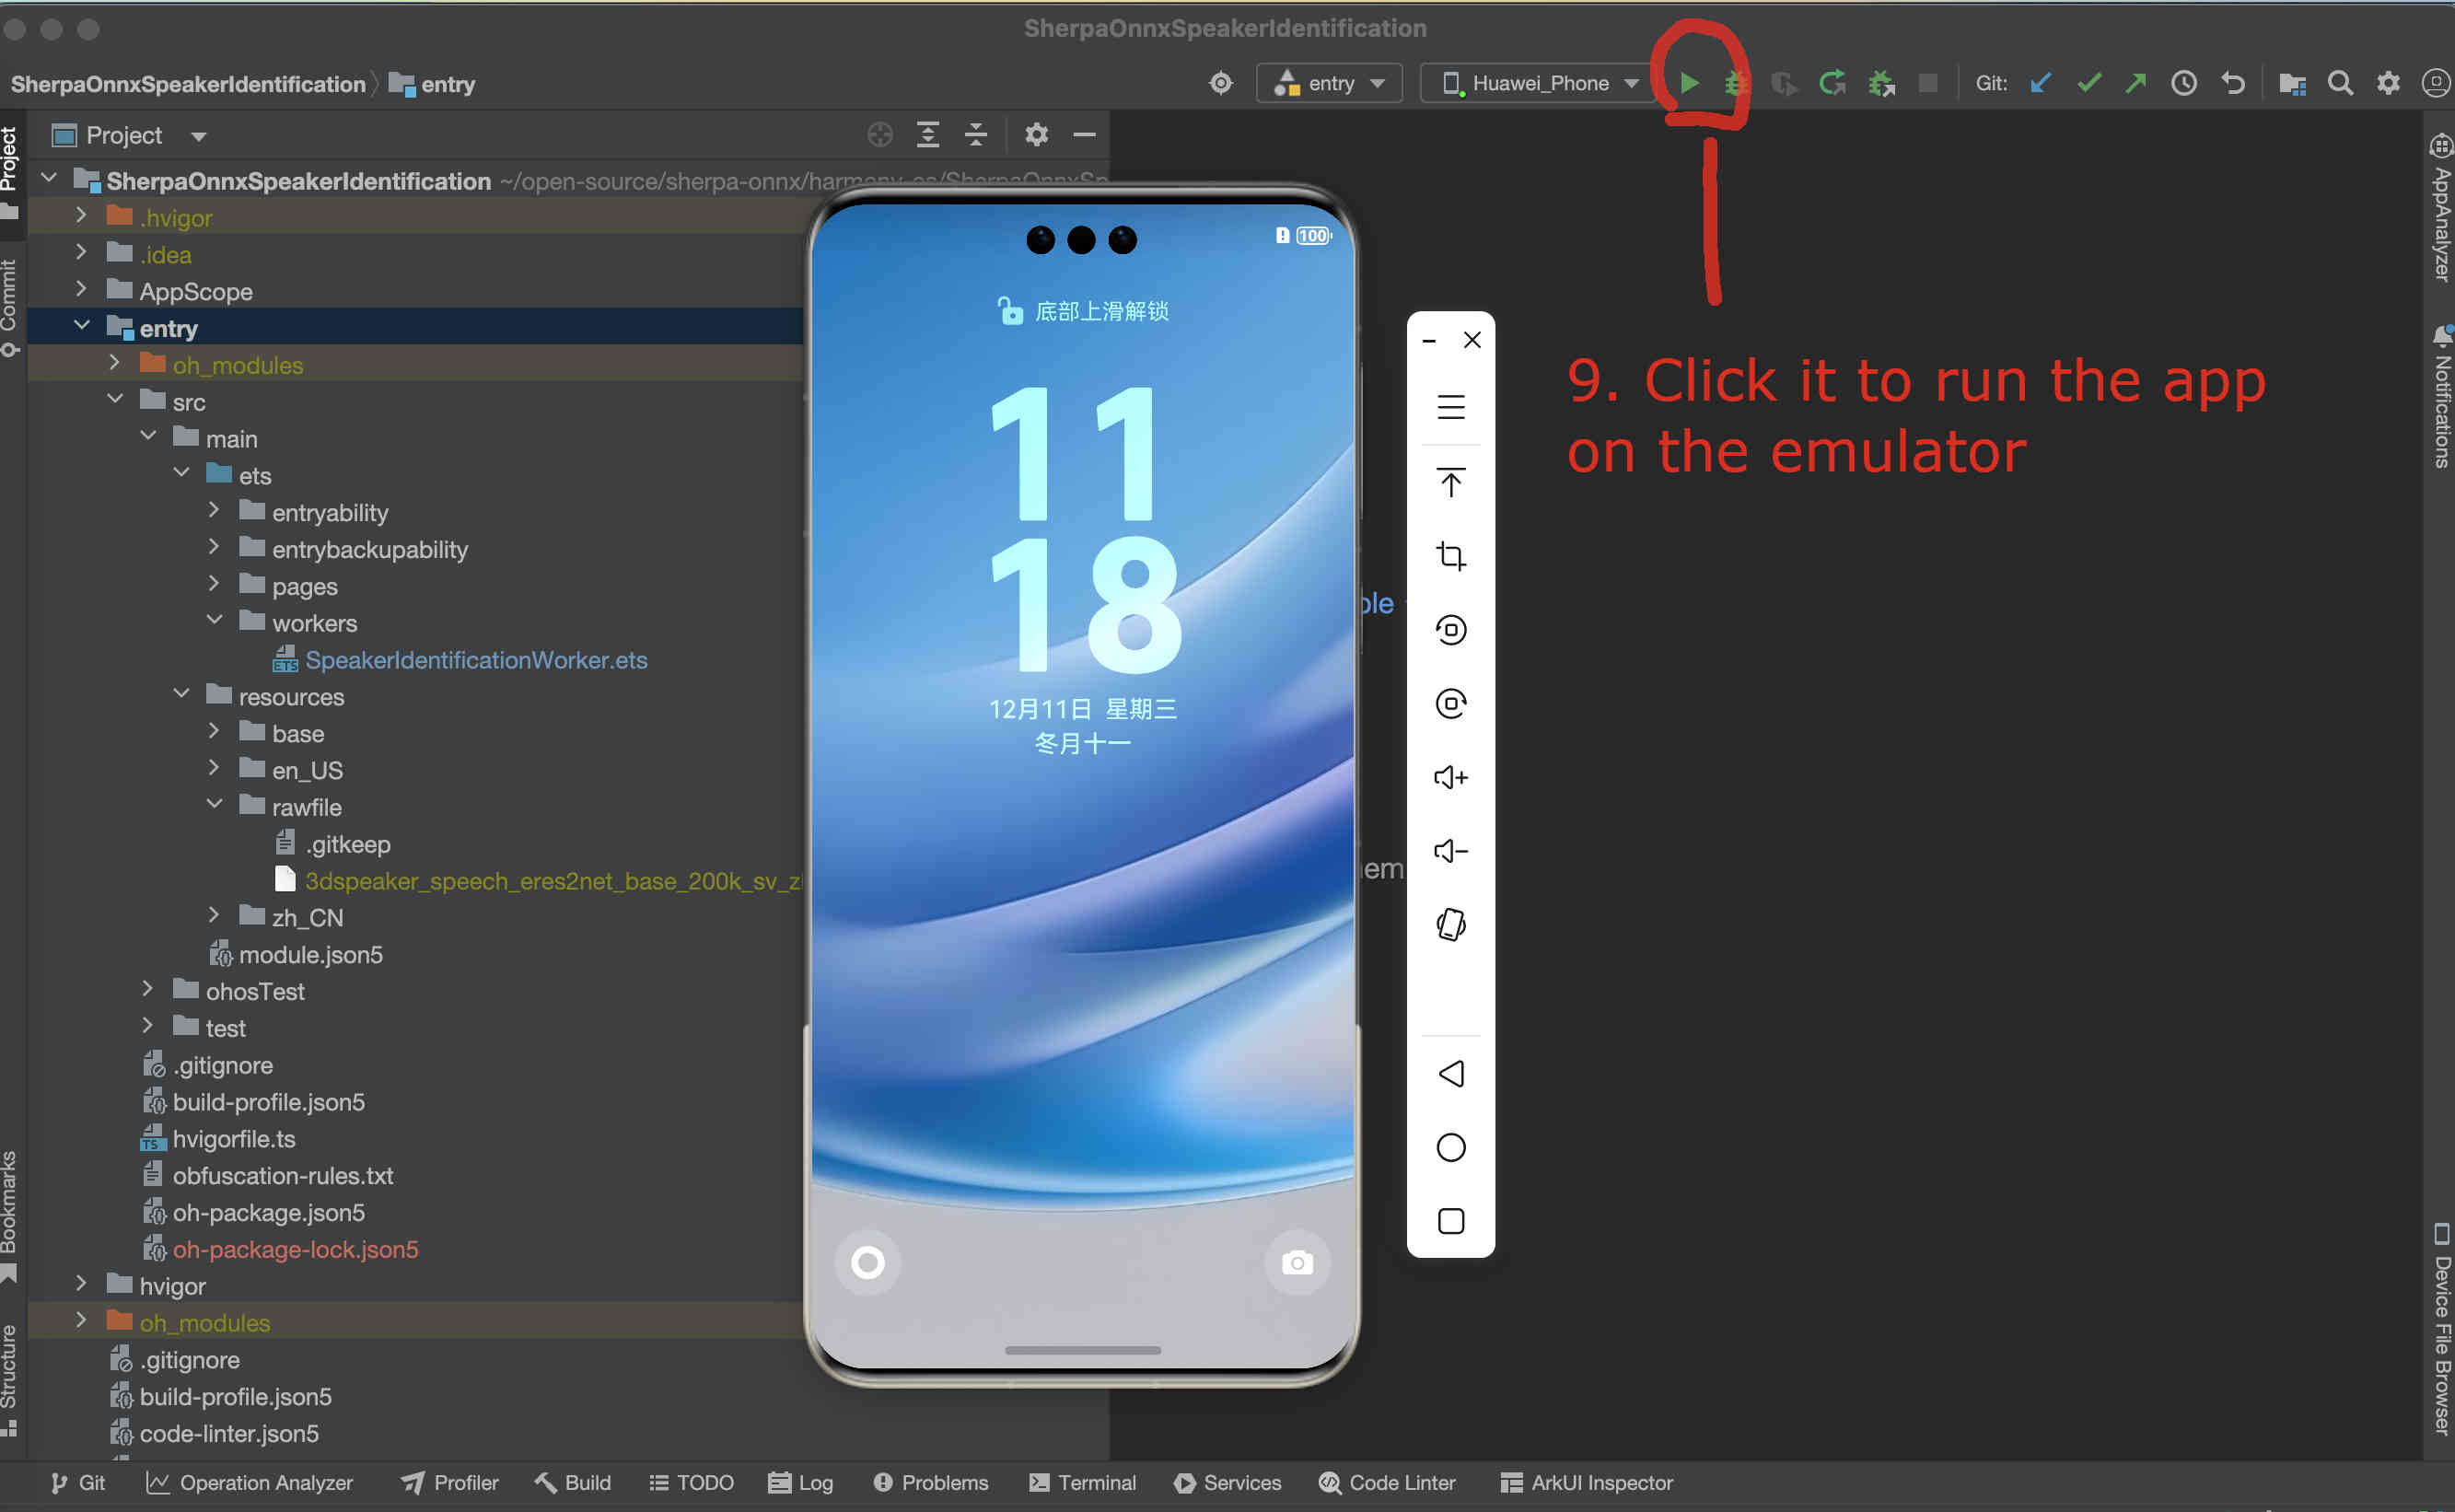
Fig. 51 Step 9: Start the app on the emulator
You should see something like below:
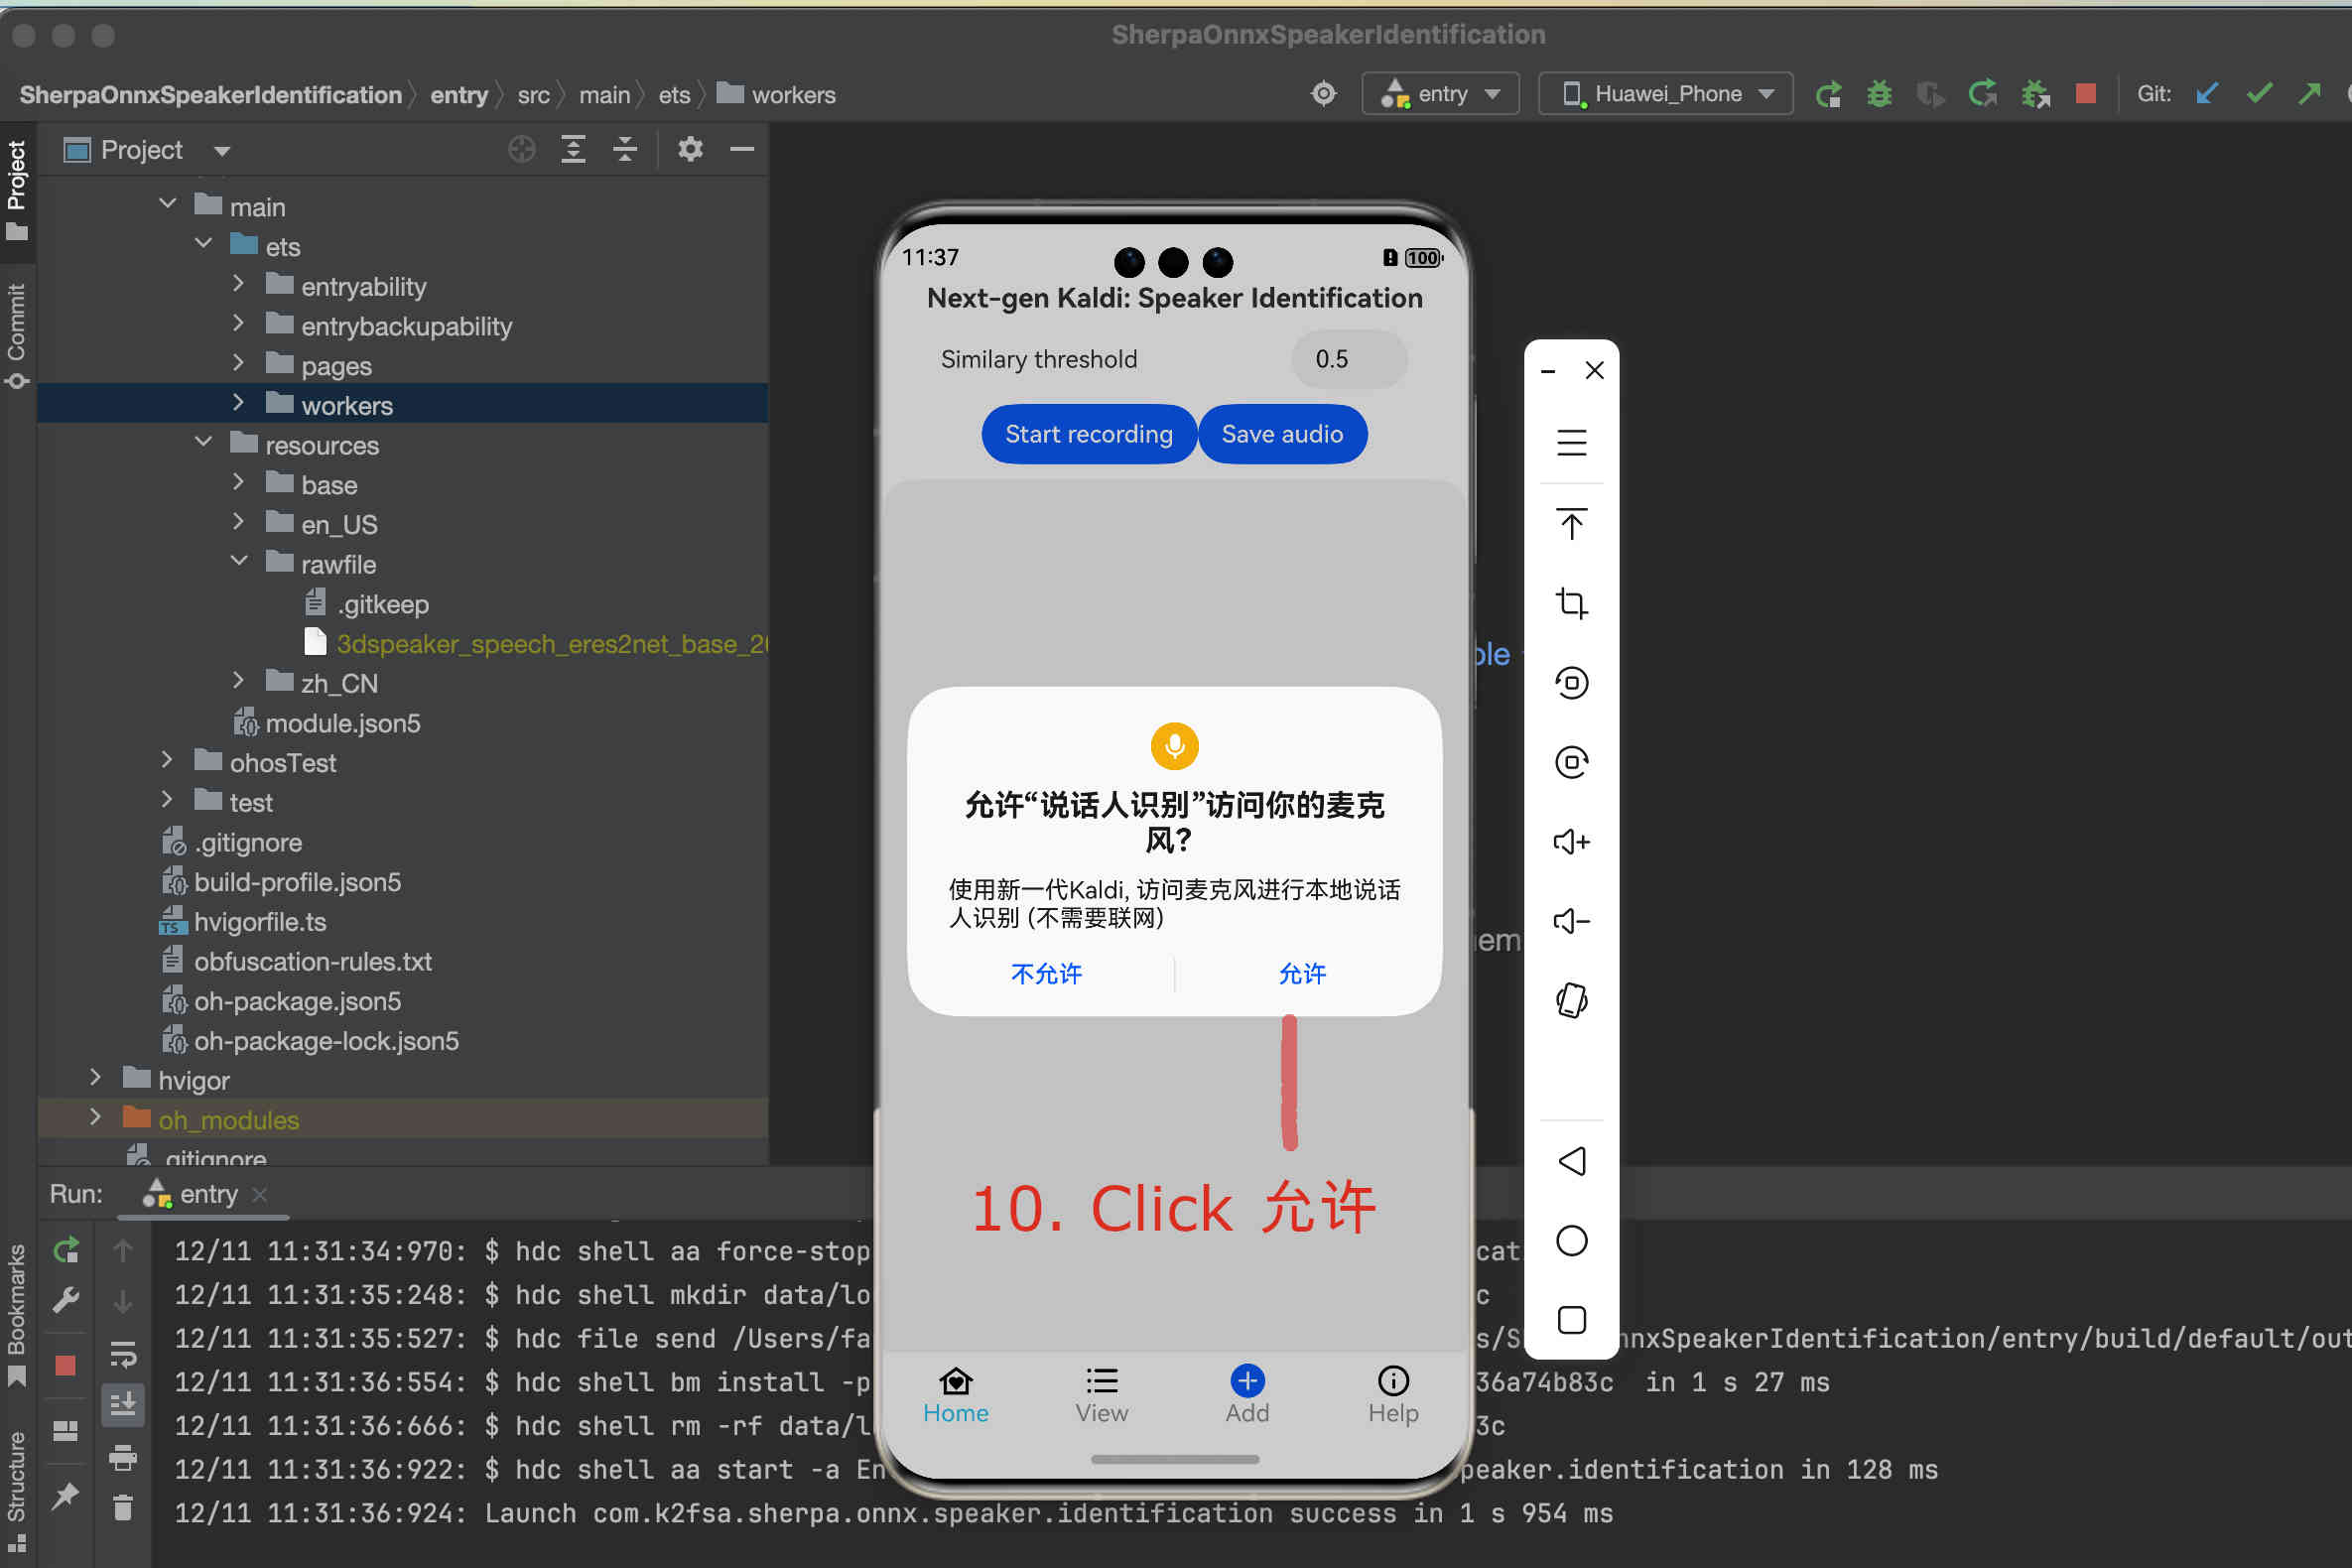
Fig. 52 Step 10: Click Allow to allow the app to access the microphone
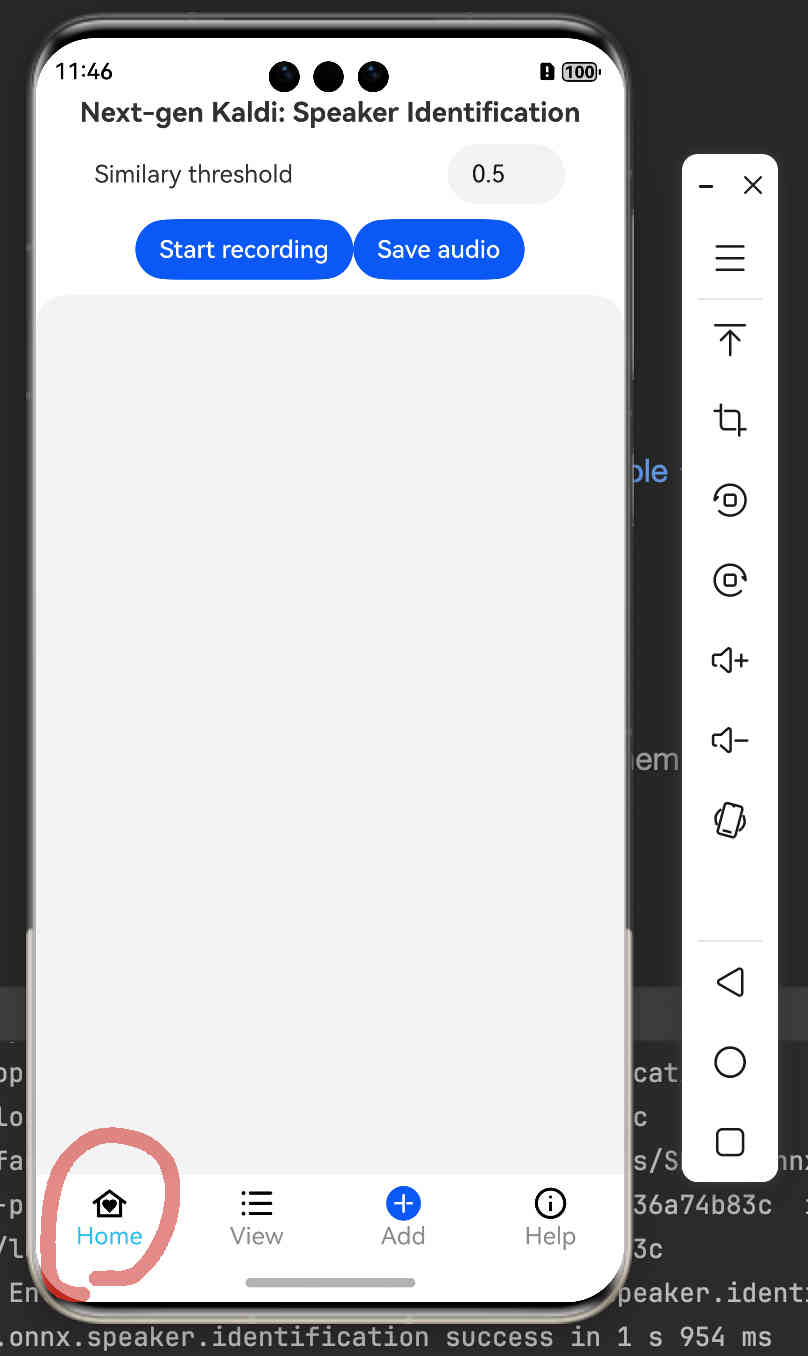
Fig. 53 Step 11: The home screen
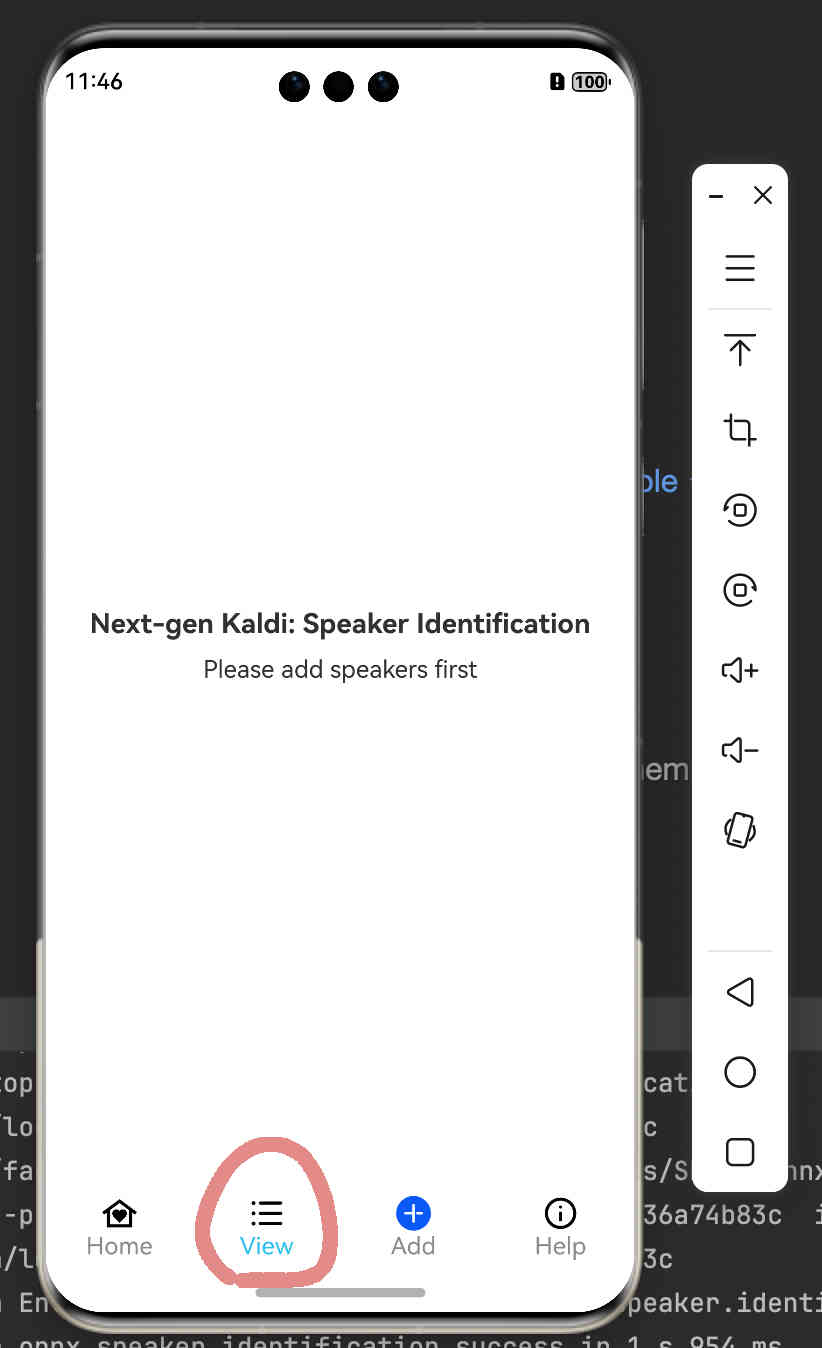
Fig. 54 Step 12: View and manage registered speakers
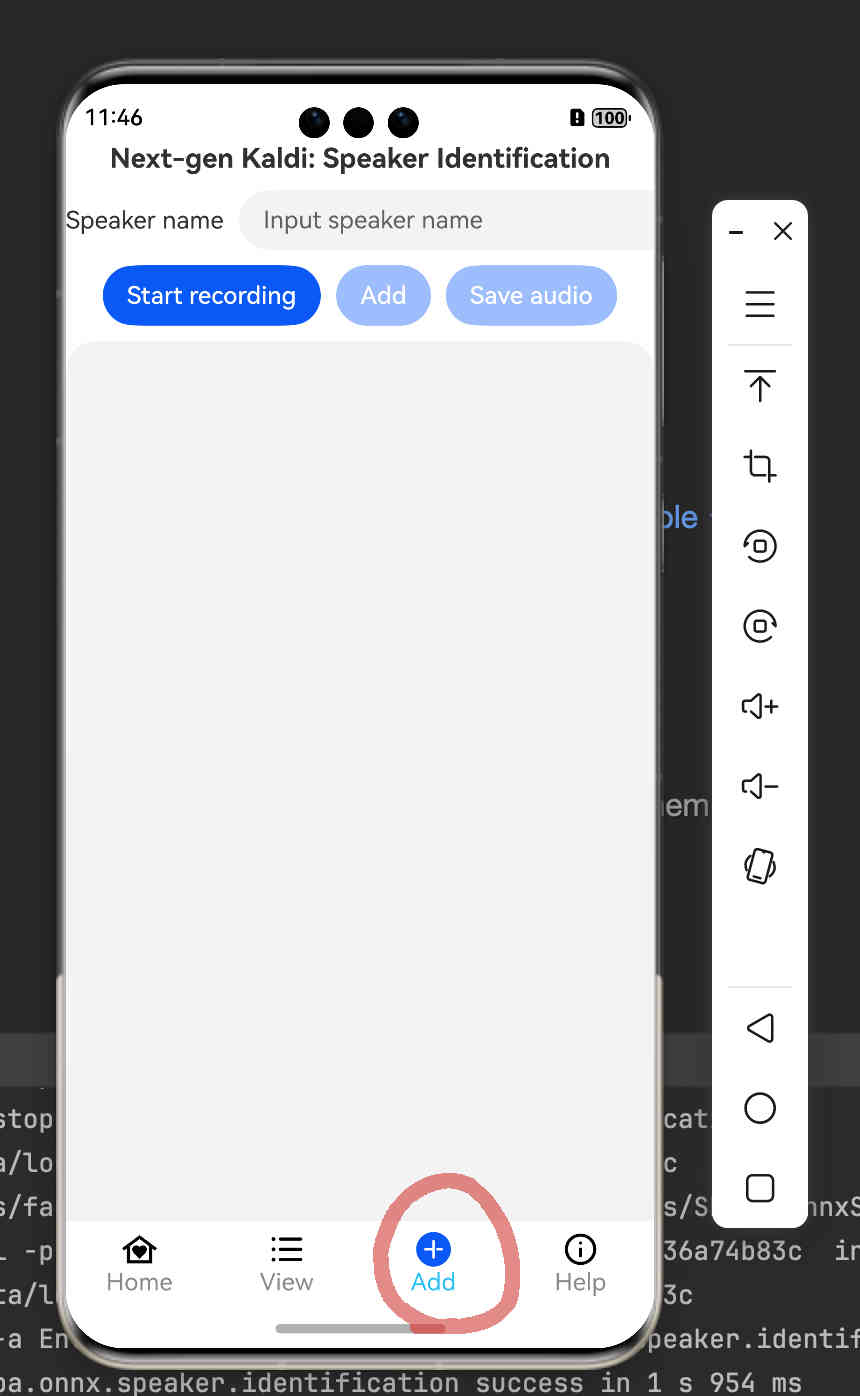
Fig. 55 Step 13: Add new speakers
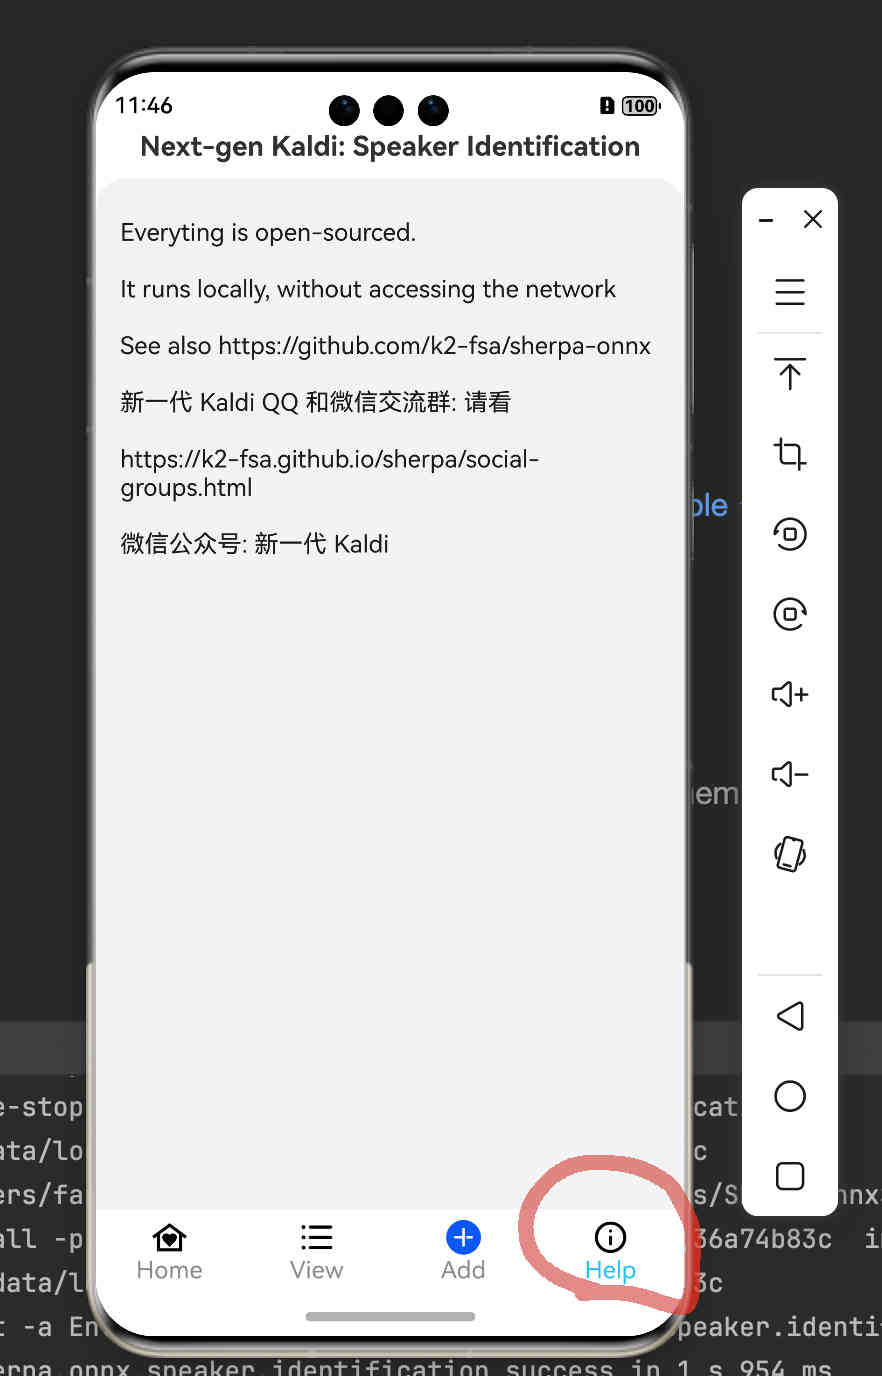
Fig. 56 Step 14: View help information
Congratulations!
You have successfully run a on-device speaker identification APP on HarmonyOS!